Weed Removal for Xeriscaping: Northern Yard Prep Guide
Get step-by-step tips on how to remove weeds before installing rocks or artificial turf in cool-season northern regions for lasting xeriscape success.
Weed Removal for Xeriscaping: Northern Yard Prep Guide
Introduction
If your 1,000 ft yard looks more like a battleground of dandelions, thistle, and creeping charlie, you're not alone. In cool-season climates of the northern US and Canada, a stubborn weed seed bank can turn your xeriscaping dreams into a weedy nightmare. Whether you're laying down pea gravel, decorative rocks, or artificial turf, inadequate preparation risks seeing those same weeds poke through and ruin the clean look you've worked for.
I've tackled every stubborn patch imaginable, and I've learned that a staged, multi-method approach is the key to lasting success. In this guide, you'll get practical, step-by-step advice on weed removal for xeriscaping, including mechanical, chemical, and solarization techniques. We'll also cover barrier installation, timing tips, and safety reminders so your low-maintenance landscape stays weed-free for seasons to come.
Why Proper Weed Removal Matters for Xeriscaping
Skipping thorough weed removal is like building a wall on an unstable foundation. Even the best landscape fabric won't hold back deep-rooted perennials or heat-loving seedlings if you don't tackle them first. Here's why investing time now pays off in the long run:
Prevents regrowth beneath rock or turf layers.
Reduces labor and maintenance costs down the road.
Ensures cleaner lines and professional-grade results.
With the right prep, you'll have more time to enjoy your landscape and less time playing whack-a-weed.
Ready to transform your lawn?
Get personalized AI guidance for the perfect lawn. Download Grassmaster Gus now!
Understanding Weed Types in Cool-Season Lawns
Annual vs. Perennial Weeds
Annuals (crabgrass, common chickweed) sprout from seeds each spring and die in fall. Controlling their seed bank early prevents future flushes.
Perennials (dandelion, creeping charlie, thistle) survive year after year via roots or rhizomes. These require deeper mechanical or systemic chemical control.
Common Northern Invaders
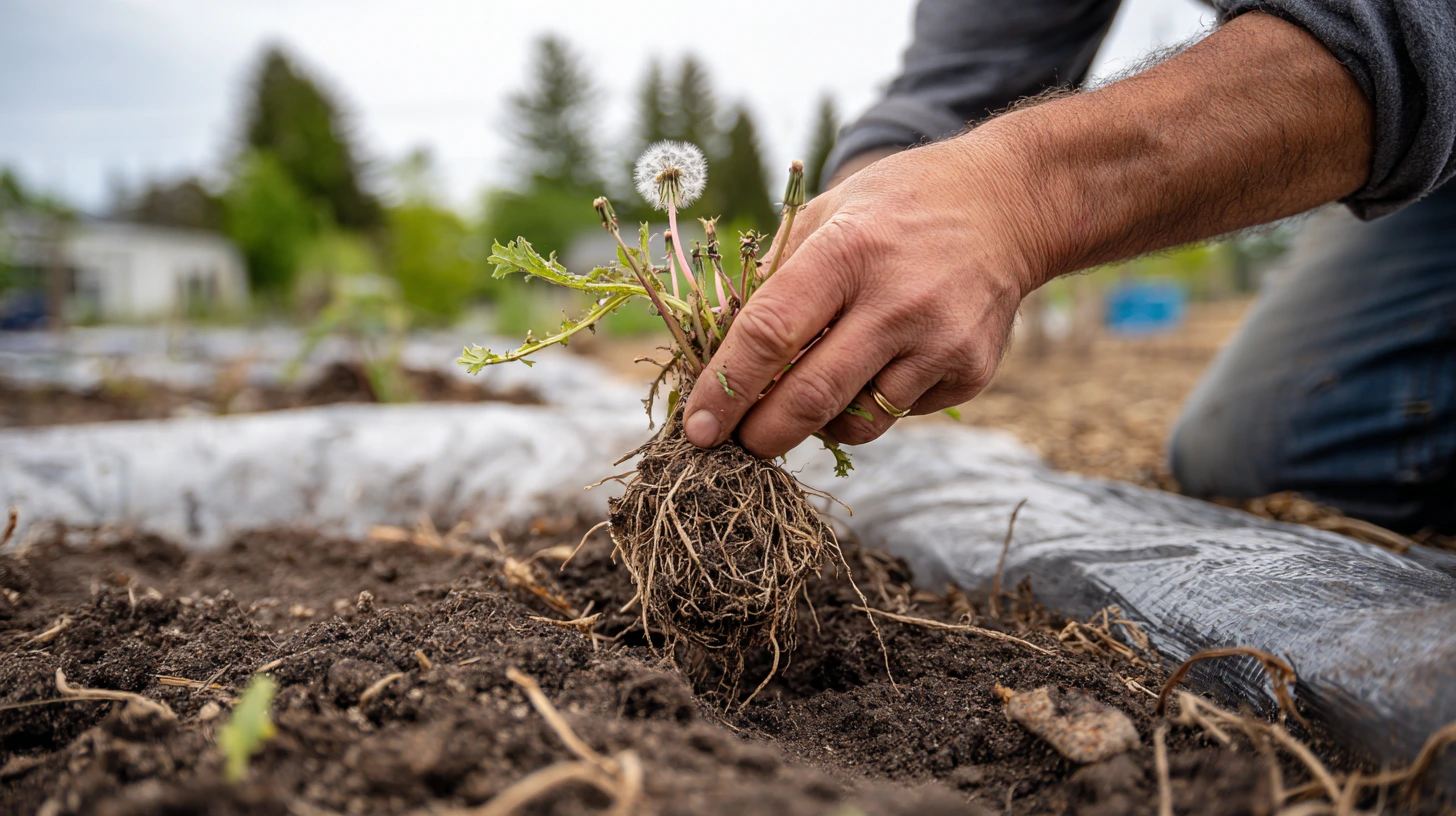
Dandelion: A taproot champion, often bouncing back after superficial pulls.
Creeping Charlie: Sends runners across and below the soil--hand pulling rarely stops it all.
Crabgrass: Thrives in bare patches; preemergence herbicides can shut it down before germination.
Understanding your enemy is half the battle. Once you know what you're up against, you can choose the right tools.
Step-by-Step Weed Removal Methods
1. Mechanical Methods
Hand Pulling and Grubbing
Best for small patches or deep-rooted perennials.
Work after rain when soil moisture loosens roots.
Use a weeding fork to pry taproots free without breaking them off.
Tilling
Rent a rear-tine tiller to break up the top 4-6 inches of soil.
Pros: Quickly uproots established weeds across large areas.
Cons: Brings buried seeds to the surface; follow up with preemergence or solarization.
2. Chemical Control
Non-Selective Herbicides (e.g., Glyphosate)
Kills green foliage down to the roots.
Spray on a calm day to minimize drift.
Wait 7-14 days after application before soil disturbance or hardscape installation.
Preemergence Herbicides
Applied in early spring when soil temps hit 50-55 degreesF.
Creates a chemical barrier that prevents new seeds from sprouting.
Note: Doesn't affect existing weeds--use with mechanical or non-selective methods.
Natural/Bio-Herbicides (Acetic Acid/Vinegar)
Safe for small patches and organic-minded gardeners.
Requires repeated applications; best on seedlings or tiny broadleaf weeds.
Less reliable on established perennials.
3. Solarization Technique
Solarization uses the sun's power to bake weed seeds and roots.
Steps:
Mow weeds as low as possible.
Water the soil thoroughly--moist soil conducts heat better.
Cover with clear plastic (4 ml or thicker). Seal edges with soil or rocks.
Leave in place for 4-8 weeks during the hottest period (late spring to midsummer).
Pro tip: In our shorter northern summers, you may need two seasons of solarization for really tough infestations.
4. Flame Cultivation (Optional)
Uses a propane torch to rupture weed leaf cells.
Effective on young weeds before roots deepen.
High fire risk--use only on non-flammable surfaces and follow local burn regulations.
Installing a Barrier and Preparing the Site
Weed Barrier Fabric
A quality geotextile fabric is your frontline defense under rock or turf.
Overlap seams by at least 6 inches.
Secure with U-shaped garden staples every 2-3 feet.
Cut X-shaped slits for any plants you want to retain (groundcover accents).
Mulching Options (Optional)
Organic mulches (wood chips, straw) can go over fabric in planting beds.
Synthetic mulches (rubber nuggets) look neat but watch for color fading in sun.
Timing, Safety, and Regional Tips
Optimal Timing
Early Spring: Apply preemergence herbicides as soon as ground thaws.
Late Spring to Midsummer: Solarization window; hottest weeks of the year.
Anytime Weeds Are Greener Than Dormant: Non-selective herbicides work best on actively growing foliage.
Local Regulations
Check provincial or state guidelines--some areas restrict glyphosate or require buffer zones near waterways.
Organic communities may prohibit synthetic herbicides--plan mechanical or solar alternatives.
Weather Considerations
Avoid herbicide on windy days or when rain is forecast within 24 hours.
Solarization needs consistent heat; skip if extended cool, cloudy weather is predicted.
Safety Reminders
Wear PPE: gloves, goggles, and respirator when handling chemicals.
Keep kids and pets off freshly treated or solarized areas.
Follow label instructions to the letter--no shortcuts.
Conclusion
Clearing your yard of weeds before installing rocks or artificial turf takes planning, patience, and a mix of methods--but the payoff is a low-maintenance xeriscape that stays clean year after year. Start with mechanical removal or a non-selective herbicide to knock out mature weeds, lock in lasting protection with preemergence barriers or solarization, and finish strong by installing a quality weed barrier fabric.
With these steps in your playbook, you'll sidestep the frustration of weeds poking through your hardscape. Take it one stage at a time, respect local regulations and safety practices, and you'll end up with a tidy, tough-as-nails landscape that looks great and frees you from constant upkeep.
Transform Your Lawn with AI-Powered Care
Join thousands of homeowners achieving their dream lawn with personalized guidance from Grassmaster Gus.
- AI-powered lawn analysis
- Personalized care schedules
- Expert advice 24/7
- Track lawn progress
